
Walk into this Cobham dining room now and you'll find a round table dressed simply — a stone jug of garden flowers at its centre, a navy linen runner crossed with a rust one, a scatter of white slipcovered chairs pulled in close, and a limed console table standing behind it with its brass cup handles catching the light. Everything in the room reads soft, warm, sun-washed. None of it hints at how much work went into getting that limed dining table top to this point.
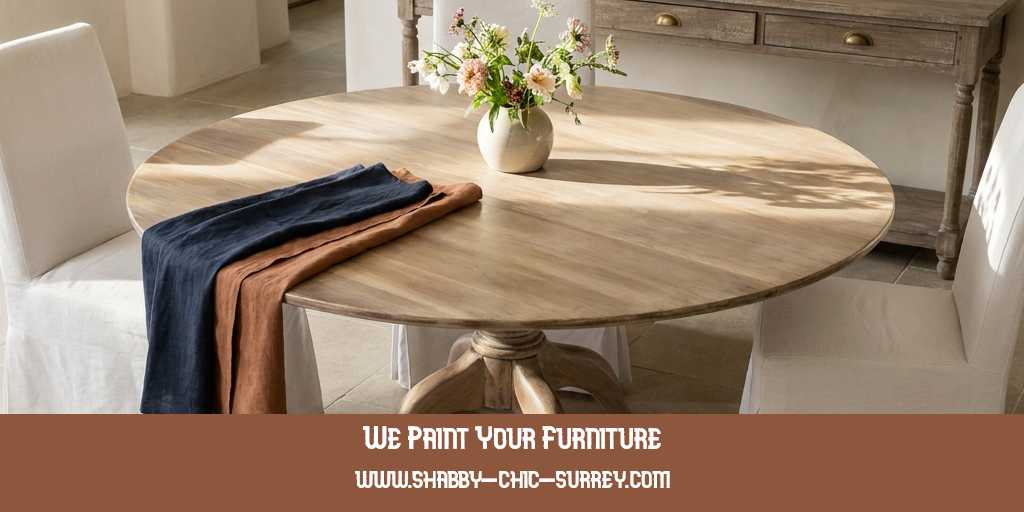
Limed Dining Table Looking Smooth
The Piece
We normally only lime pine and oak. It's a rule we stick to because those woods take a lime finish predictably. This table broke it. It was a very large round dining table in an Asian hardwood, built for a very large house, and it arrived heavily varnished and stained a deep, dark colour — about as far from "limed" as a table can get. We took the job on because the client wanted the limed look specifically, and because we were confident the hardwood would behave if we prepared it properly. It did.
Liming the Dining Table: The Step by Step Process
Step 1: Sanding
This was the real graft of the project. We worked the varnish and the stain off in stages, stripping the tabletop back layer by layer. The curved pedestal legs and feet were the hardest part — every curve had to be sanded by hand, working the paper into the shape rather than against it. The tabletop itself was immense, so this stage alone took real time.
Step 2: Cleaning
With the varnish and stain gone, we wiped the whole piece down with a tack cloth to lift every trace of dust before going anywhere near it with colour.
Step 3: Liming
Underneath all that varnish was a much lighter, more open-grained wood than we'd expected, and it took the lime paint — Annie Sloan Old White — beautifully. Liming works into the grain rather than sitting on top of it, so the natural character of the timber stayed visible through the finish.
Step 4: A hand sand
Once the lime had gone on, we sanded the tabletop again. This wasn't about correcting a mistake — it's simply what a tabletop this size needs to bring the whole surface to one even, consistent look, rather than patches that had taken the lime slightly differently.
Step 5: waxing and Polishing
We finished everything with Annie Sloan clear wax, buffed in to seal the lime, protect the wood, and give the table the soft, low sheen it has now.
Liming the Dining Table
The table was big. So big that it really was massive. The sort of sized table that you might encounter at a hotel or conference centre dinner!
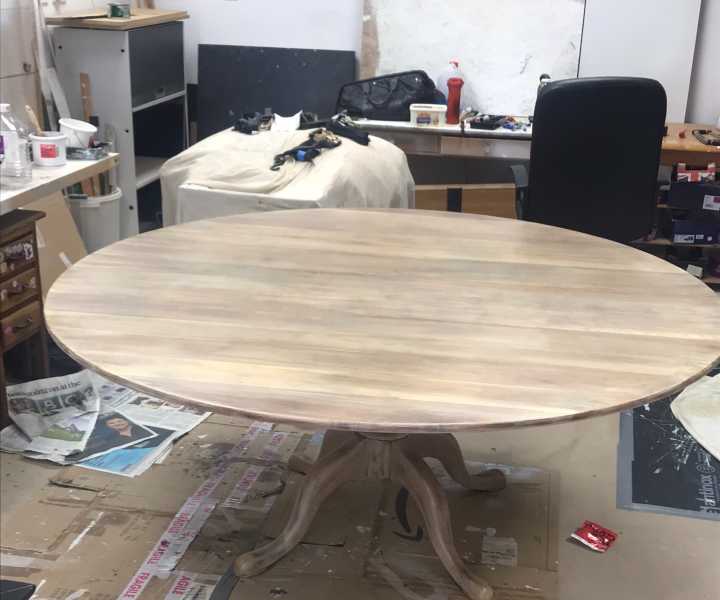
Nearly finished with waxing and polishing the limed dining table
We don't normally recommend trying to lime a hardwood, apart from oak, but this table certainly proved us wrong, once we had got the wood dye out of the equation..
The After
That's the table now sitting in the photograph — pale, warm, sun-touched timber with the grain still visible through the lime, exactly as it should be. The client dressed it simply: flowers, linen, a scatter of chairs. Because when a table this size has been done properly, it doesn't need much else.
Thinking about Transforming a Piece of Furniture?
If you've got a large or unusual piece of furniture, dining room or otherwise, you assumed was off-limits for liming, get in touch. This one proved the rule has exceptions — give us a call and we'll tell you honestly whether yours is one of them.
Let's Get In Touch
Contact Details
When it takes sanding, painting, varnishing or waxing to get there, give us a call if you've got furniture that needs a transformation.
Phone Number
07351 101851
Email Address
furniture@shabby-chic-surrey.com